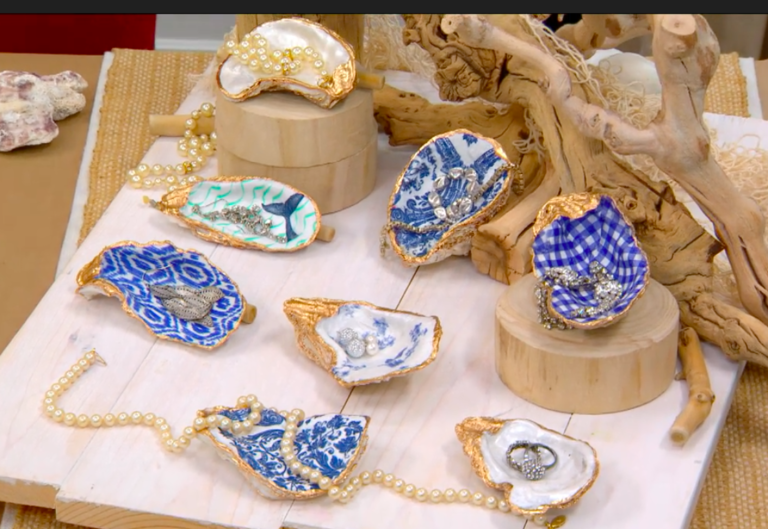
Bring a little bit of coastal elegance into your space! We’ll walk you through making a fashionable oyster shell jewelry tray in this do-it-yourself tutorial, which will not only give your decor a hint of the seaside but also double as a chic organizer for your favorite accessories.
Come see how to transform common oyster shells into a magnificent work of art. Bring a distinct seaside charm that reflects your individuality into your environment. Let’s use our imagination to create a stylish and customized jewelry tray.
Follow the directions to turn common oyster shells into a chic and useful jewelry organizer.